Gardena Sprinkling System with HomeMatic and openHAB
Spring Time: Time for a new lawn ... and a sprinkling system
The first days in march I used to renew the lawn in my garden. As we were right in the beginning of the covid-19 crisis it took me some more time than planned but at around end of April everything was done.
In this post I want to explain the steps that I have done which might help you in smiliar projects.
Planning the sprinkling system
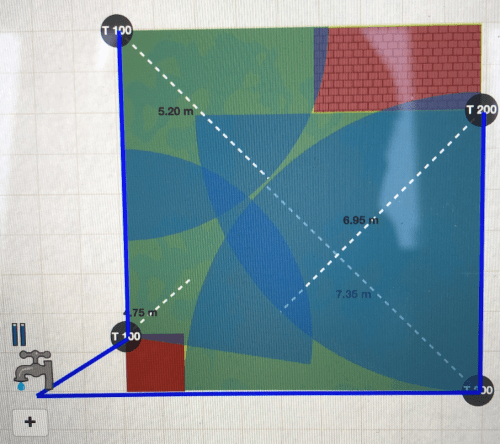
If you think of getting a sprinkling system the first thing that you need to have is a plan. A plan about what your sprinkling system should look like. That means you have to check where your water supply is located and how much pressure your connection has. Especially the last point plays an important role as this will be the basis of how many sprinklers you can operate in one go. This also dictates how many pipelines you will have to lay depending on the number of sprinklers required. To find out the pressure of your water supply, Gardena offers a few handy tips and tricks: Take a 10 Liter bucket and count the seconds until it is full. You will find some external links to the offical Gardena Planner where you'll find further information what to do with that number. Next thing is to plan the sprinkling system. Gardena provides an online tool where you can basically draw your garden and place all things, trees, lawn, patio and so on before you actually start positioning the different sprinklers. This tool will give you a first impression on what your sprinkling system will look and it will give you a check list to help you with your purchases! Very nice!
Planning the smart home components
It also definitely makes sense to think about how to control your sprinkling system. There are a lot of different possibilities, from switiching it on manually to integrating it completely in your smart home system to leverage its full potential. The latter was my plan. The easiest and most expensive solution would have been to just buy the smart home control from Gardena directly and integrate it into my openHAB solution. But I wanted to try something a bit different: The pressure of my water supply forced me to lay two pipelines which meant I need to have two valves where each valve feeds two Gardena T200 sprinklers. For my case, I chose the 24Volt variant of the Gardena valves. To control them now without using any control system of Gardena, I had to set up two circuits with 24VAC for both valves. Then I put a smart switch in each circuit which allows me to open/close the circuit and therefore the valve. In your case, this could be any switch from any vendor that is able to handle 24V. In my case, I still had three channels left on my HomeMatic 4-fold actuator HM-LC-Sw4-WM which totally fulfilled my needs and saved me some bucks as well. With that, the planning should be completed! Time to order all the things online or shop at your prefered hardware store locally - your choice. By the way - you'll find a full check list for the smart home stuff at the end of the blog post.
Getting rid of the old lawn
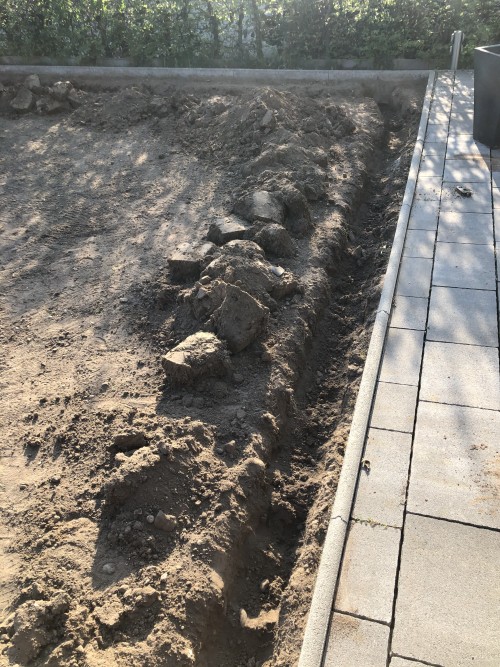
The intenion of my project was to replace my whole lawn. If you only tend to install a sprinkling system, you can skip this chapter. Depending on the area of your lawn, this might be where the challenge comes in. My garden is ca. 75m² and to make life really easy I rented a turf cutter (in German: Sodenschneider). I can really recommend renting such a tool as I was done in approx. 1 hour with driving a couple times criss-cross through my lawn. There is acutally nothing you can do wrong here. But don't forget to think of a place where you can dispose your old lawn if needed!
Install the sprinkling pipelines and sprinklers
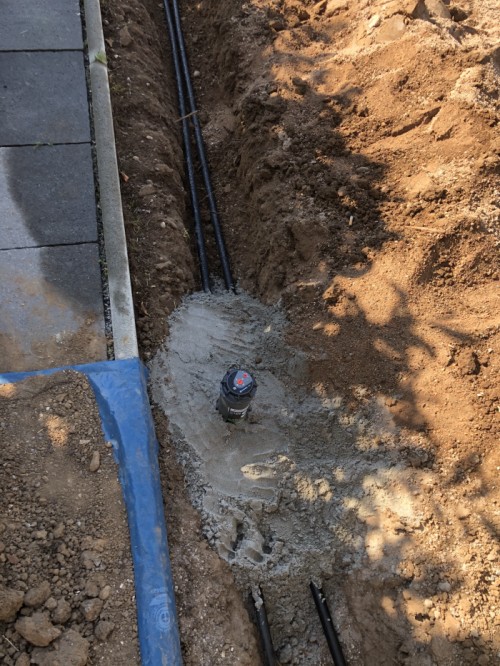
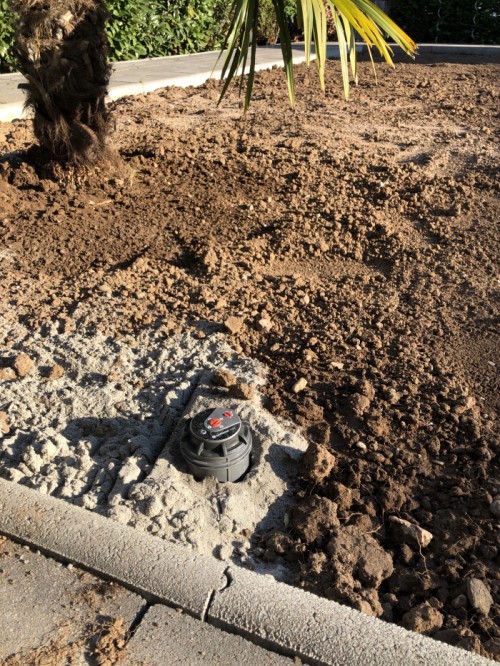
Before laying the pipelines you have to dig a small pit where you can put your pipelines. The pit has to be approx. 25cm deep measured from the surface of your lawn. Lawn and the head of your sprinkler have to be about on the same level so that your lawn mower won't cut it afterwards. Also keep in mind to have one place where you dig a bit deeper than elsewhere to install your drain valve. I used some pebbles as a subsoil to have a better drainage, which is also recommended by Gardena.
Once all the hard work is done, let's start laying the pipes! The Gardena plug'n'play system makes life really really easy with connecting all pieces together, that was just wonderful and worked out much better than I was anticipating. You just have to keep in mind to not forget the drain valve. I can really recommend to use sand to align the sprinklers. The sand gives you a stable foundation but still allows you to adjust the sprinkler a bit to the left and right with keeping them in position afterwards.
If you have multiple valves to accomodate like me I can also recommend that you try out the valve box of Gardena. Not only that, it helps you organizing the power cords it also protects your valves from weather and rodents. What's more, it comes with the same easy plug'n'play system that connecting the valves to your water supply is not worth of explaining. It comes as a casing for one and three valves with the possibility to complement each other. I only have one valve box for three valves.
After installing the pipelines and adjusting all sprinklers it's time to go for a test run (you can open your valves manually)! Check that all your connections are sealed and whether your drain valves are working if you turn off the sprinkling system again (They will open up if the pressure is under 0.2bar or so). If everything's gone smoothly, you are ready to fill the pit again! After that all dirt work is over, the next steps are integrating the sprinkling system into your smart home (those of you who are paying close attention might have remembered that I still don't have any new lawn in my garden).
Laying the new turf and installing the lawn mower robot
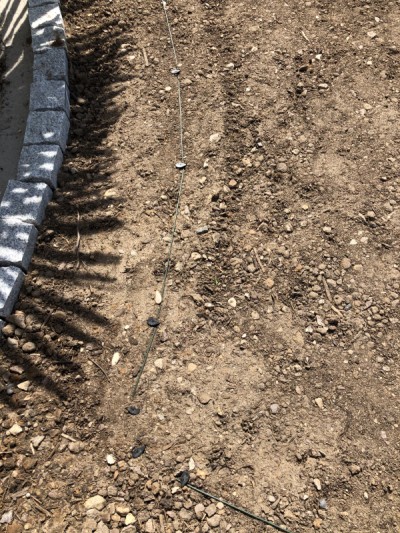
As I really like technical tools, it's hardly surprising that I own a lawn mower robot, precisely a Worx Landroid S. This type of robot needs a power cord at the edge of your lawn to delimit the area where it should mow. So, before putting on the new lawn it makes sense to lay the power cord accordingly and check whether the mower is able to follow and doesn't get stuck because of too narrow edges.
Afterwards it's time to lay the turf. The pieces have the size of approx. 30cm x 200cm and it didn't take a lot of time to lay the new turf in my garden.
Setup the power curcuit for the 24V valves
Installation inside the valve box
Let's start with the installation inside the valve box. The 3-valve box comes with an integrated connection terminal strip with 10 connection points in total: 1-6 and 4xCs. You may wonder why you have six connections for the valves, but in truth this is only necessary if you complement a 3-valve box with a second 3-valve box which makes then in total six valves. Next step is to connect my two valves to the terminal strip. Each valve has two cords. It doesn't matter which cord you take as we deal with alternating current. Connect one cord to connection point #1 and the second cord to one of the four C's. The first cord of the second valve connect to connection point #2 and to a different C. Done!
Adding the power supply
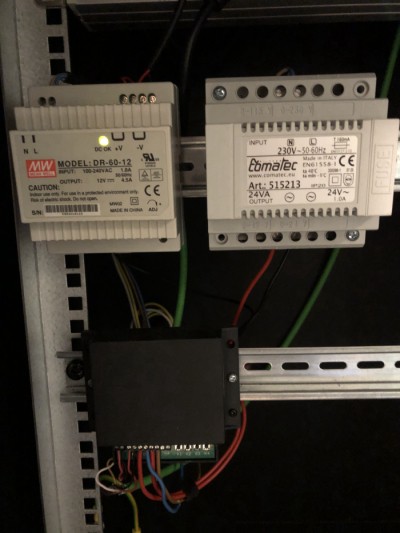
From one of the two left C's take a power cord and connect it to one of the outputs of your power supply. As already said, doesn't matter which output as it's AC. From the other power supply output there are two cords outgoing to your switches or as in my case to my HomeMatic HM-LC-Sw4-WM. The first cord uses channel #2 and the second cord uses channel #3 which means in detail that the cord goes into the left input of each channel of the HomeMatic actuator. From the right output of each channel you pull a cable back into your valve box. Connect the one power cord to connection point #1 and the other power cord to connection point #2. Done!
Switch on your power supply and you should now be able to control each valve within your smart home! You are now able to control your Gardena sprinkling system with your smart home switch of choice. Since an automated sprinkling system should work automated at a specific time, you might want to add some additional intelligence so that the system works independently without requiring manual intervention. The creation of this "intelligence" will be part a separate blog post though. But to give you a teaser what I want to achieve: Using temperature, humidty, precipitation and weather forecast to create a schedule of how long the irrgiation need to work or if the sprinkling system needs to work at all. As well, to add some security, I want to have a check whether a valve is open unintentionally.
So, stay tuned and as soon as the blog post is available, I'll link it here!
Thanks for reading! I hope this post helped you plan plan your smart sprinkling system. Please find below the promised external links and bill of materials.
Bill of material (Smart Home)
- Transformer (power supply): Comatec TRAFO 24 VA 24V
- Switch: Homematic HM-LC-Sw4-WM
- Power Cord (totally oversized but I had lots left): the individual cords of a 5x1,5mm² power cord
References
- Gardena Garden Planner: https://my-garden.gardena.com/de
- Planungsservice: https://www.gardena.com/de/service/beratung/service-bewasserungsplanung/
